Star Trails Part 1
December 15, 2021In this tutorial I will cover how I shoot circular star trails. In the second part I will cover processing of the resulting images. First off there are a couple of ways to shoot star trails in this digital era. The first method is to take one very long exposure like we had to in the film days. To do this you would take a single exposure that could vary from say 15 minutes to several hours. The longer the exposure the longer the resulting star trails. The drawback with this method is you get a single image with relatively few processing options. The single long exposure option will take quite a lot of experimentation to get right.

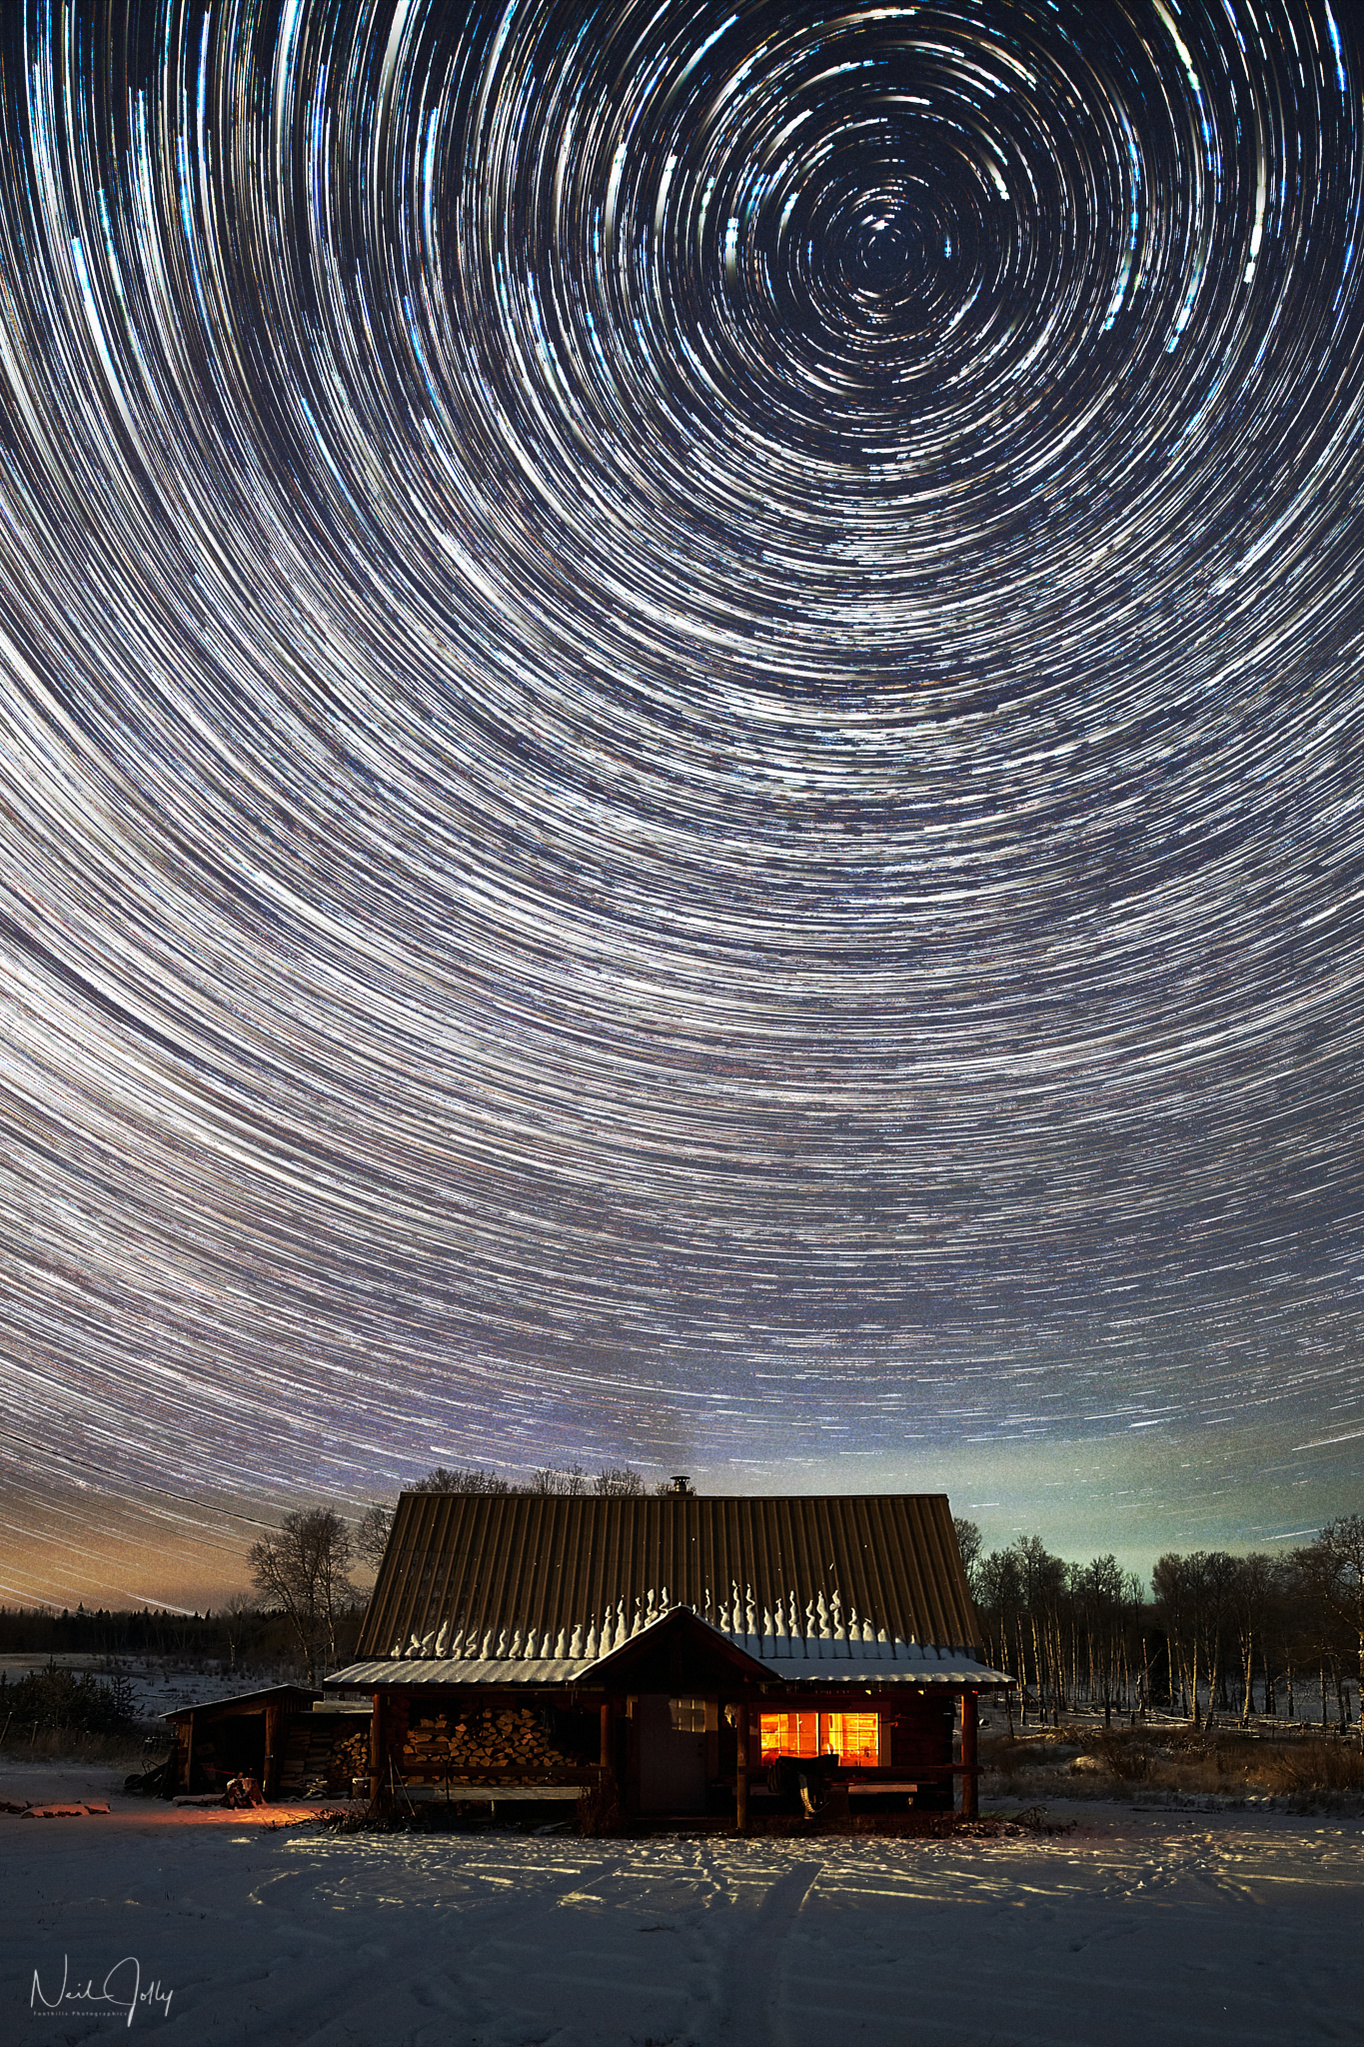
The second method, the one I prefer, is to take many individual exposures and stack them to create the star trails. The reason I prefer this method is you have a lot more processing options. I took 332 exposures of 32 seconds each, at ISO 3200, and stacked them in a software program called StarStaX. StarStaX is free and does a good job of star trail image processing. The image above is the result of those 332 images processed in reverse order in StarStaX. I will go into detail in the second part of this tutorial as to why they were processed in reverse order.

Now I will give a few examples of why the stacking method is superior in my opinion. First you have the option of stacking your recorded frames as a star trail, or stacking to reduce noise, and having (nearly) pinpoint stars. Second there is no predicting what you will record when taking many frames with a shorter exposure. For example you might catch a meteor, as I did here, entering earth’s atmosphere. In this case you can use one of the individual frames with a meteor in it as a single image. In one of the examples below I stacked 10 images to reduce the noise and the end result had pinpoint stars, with greatly reduced noise, but the meteor was removed in the process. I added the single meteor back into the stacked image during processing and the result was relatively clean image of pinpoint stars including a meteor over my cabin. From that same stack of 100 images I produced the image you see above by stacking all of the images in StarStaX. In the end I had two good, very different, images from my stack of exposures. I could even add the meteor back into the image resulting from StarStaX for an image with both star trails and a meteor. Had I have chosen to do a single long exposure I would have had a single star trail image to show for my night’s efforts.

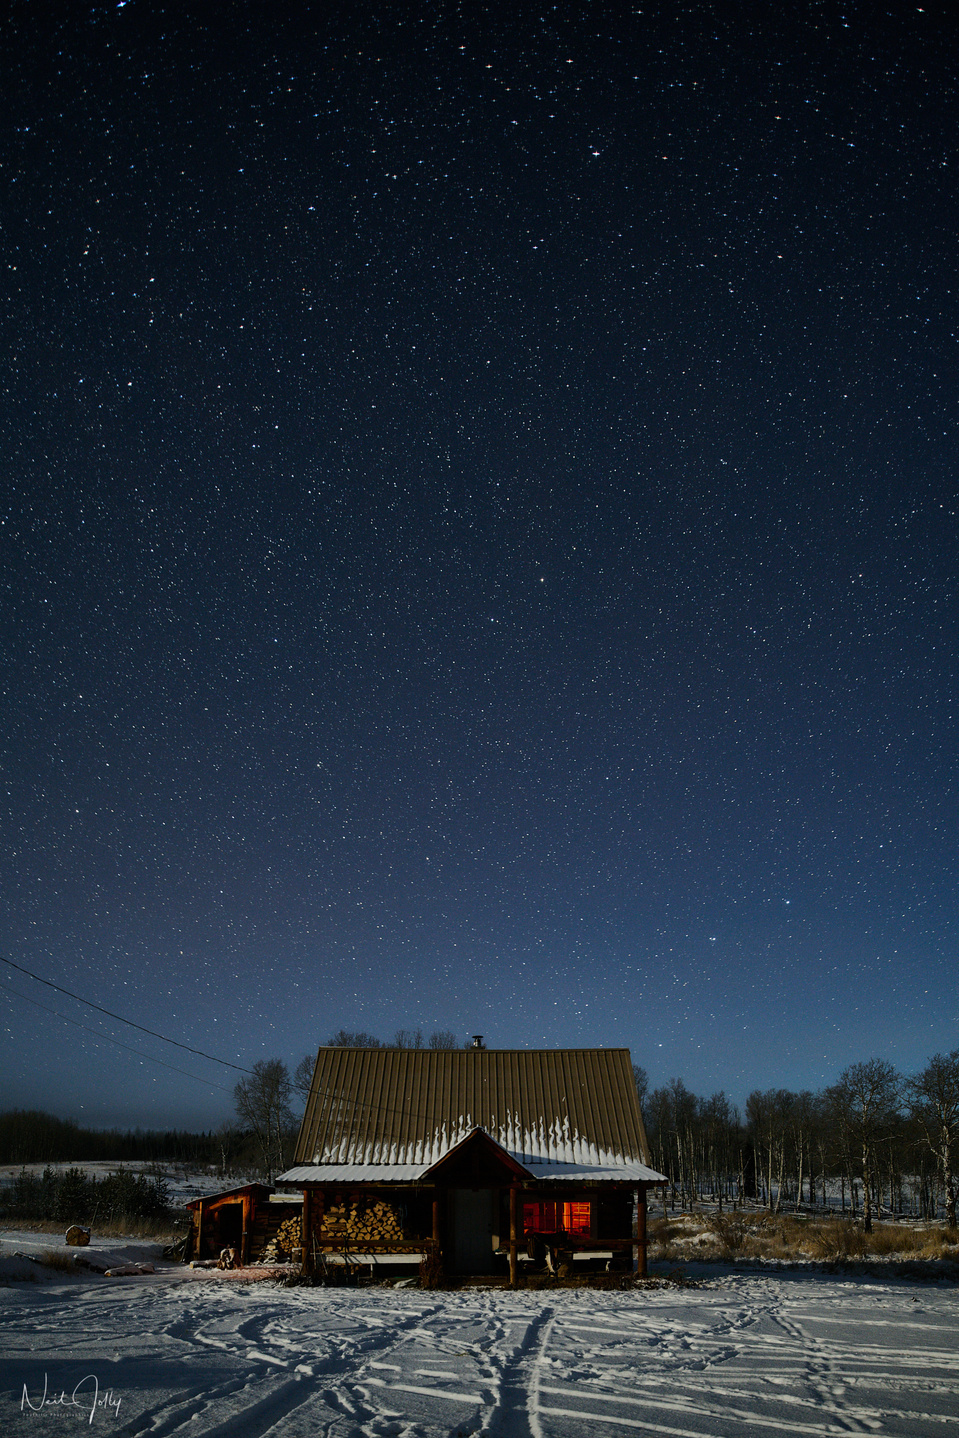

Step one of shooting star trails, with circular trails, is choose a suitable location. Here in the Northern hemisphere stars appear to rotate around Polaris, or the North Star as it’s also known. So you need a location, preferably with some interesting foreground, that looks towards the north. Next you have to locate Polaris and compose your frame so that polaris is in the frame. Depending on your foreground you may want to light paint it or have it illuminated by a partial moon as I did in one of the exposures above. Set your camera up with a relatively high ISO (say 8000 or 12,800) and get your focus set. Use liveview and set your focus so that the stars are the smallest points possible when zoomed in. I usually shoot my night sky shots stopped down a bit to say f4 to give a little more depth of field. I try and keep a bit of distance between the camera and my foreground so I can get them both in focus.For the examples above I used a tilt/shift lens to keep the verticals straight in the cabin while getting a maximum amount of sky. Now set your ISO back down to the 3200 ISO region. The ISO you expose your image at will be determined from how dark the area is where you are shooting. The darker the sky the more stars that will be visible. The downside of the dark area is your foreground will be less visible. Do some test exposures and examine the focus and composition. Adjust these as required until you are satisfied with the combined, composition, focus, and exposure. I would recommend setting up the camera to record anywhere from 50 to 750 images with up to a 30 second exposure depending on the results you are looking for. The length of exposure you can use before the pinpoint stars degrade into trails will depend on the focal length of your lens. Essentially the wider your lens the longer your exposure can be. Use the 500 Rule to determine the exposure time for your gear.
Some tips I have discovered:
- Research your gear carefully before setting out to do your night shooting.
- If your camera does not support interval shooting then you will need a seperate intervalometer
- Choose your nights carefully. You need a clear night with no, or very little, moonlight.
- A crescent moon can give some lovely soft light for your foreground
- Experiment lots
- Dress Warm! You’ll be there for a while unless you’re as lucky as I am and live in perfect dark sky location
- Snow reflects a lot of light helping to illuminate your foreground
- Avoid setting up your camera where curious animals (like a horse) might interfere with, or damage, your camera setup
In the next part I will go into more detail with the various processing options available and show examples of the resulting images. The processing options is where shooting multiple frames to combine really shines. I will also show how to reduce noise in your foreground.This is by no means an in depth tutorial on shooting star trails. It’s meant as a guide to get you started and get your creative juices flowing. Searching the internet for how to shoot star trails will return many, more technical, tutorials than this one. Have fun☺️