Night Photography
March 2, 2019Night photography presents a host of challenges that are not nonexistent during a daytime shoot. Most of the issues that we run across in a night shoot are due to the lack of light. All the fine points that we take for granted in a daytime shoot like focusing, composing, and depth of field become real challenges at night. Shooting at night often pushes your equipment, and your photography skills, to the limits, and sometimes beyond those limits. Before going on a night shoot I would advise being very familiar with your camera’s controls and settings. Go out into the backyard at night and play around with the different settings till you are comfortable with your camera’s layout and operation. Test out different ISO settings and shutter speed combinations to evaluate after you download the images. A bit of internet searching for your camera’s model and the words high ISO performance will yield some information on your camera’s potential for night shooting.
I’ll start by addressing some key concerns with equipment required for a night shoot. The first required item for an astrophotography outing is a sturdy tripod and head. The long exposure times for night shooting makes a good, sturdy, tripod an absolute must. Secondly a camera with reasonable high ISO performance is another item that you cannot do without for astrophotography. The better your camera’s high ISO capability the better the image quality potential at night. Notice I said potential! There are many more variables at play. A headlamp that has a red light mode is extremely useful for night shooting. The red light has less effect on your night vision than a bright white LED light. A remote shutter release for long exposures, and possibly an intervalometer for shooting star trails. A wide, or ultra wide, angle lense that can be shot at wide apertures like f2.8, or wider, allows a greater area of sky to be captured. All your normal rules of composition come into play at night but your limited vision makes composing an image even more challenging.
When I arrive at a night shoot destination I assemble as much of my gear as possible at the car where I have more light. The exception is when a long hike is involved. Once I have my gear assembled I put my headlamp on in red light mode and head to the area I want to shoot. After arriving at my shoot location I usually turn off my headlamp wait 10 or 15 minutes for my night vision to adjust to the low light. I also set my camera display to a lower level so it’s not so bright at night. While I’m waiting I have a look around at my surrounding for potential compositions. I then setup my equipment, take my best guess at a composition, turn the camera up to a high ISO, level your camera, set the focus to manual and infinity, set your camera to manual exposure mode, and take a shot with a long shutter speed, using your remote shutter release. Have a look at the resulting image on your camera display and evaluate your composition. Adjust and reshoot, repeating as many times as required until you have your desired composition. Once you have your composition down have a close look at your light and shadow histogram and see how close you are with your exposure. Adjust your shutter speed as required until you are satisfied with your exposure. Next we’ll adjust the focus.

To verify focus bring up the image on your camera’s display and zoom in to 100%. Look at the stars closely. The more pinpoint the stars are the better your focus is. The night sky is your primary subject, generally speaking, in a night shoot. Keep in mind that your depth of field is going to be quite limited due to your wide aperture so foreground will be soft unless you focus stack your images. Adjust and reshoot until you have the best focus on the stars you can get. Mark your lens with a bit of tape or at least make note of the optimum focus setting that you have arrived at so you can reset to that point at any time if you accidently move it. If you want pinpoint stars then a high ISO, and lower shutter speed is best. If you want star trails then a lower ISO and long shutter speed is best. For exposures longer than 30 seconds you will need to set your camera to bulb mode.
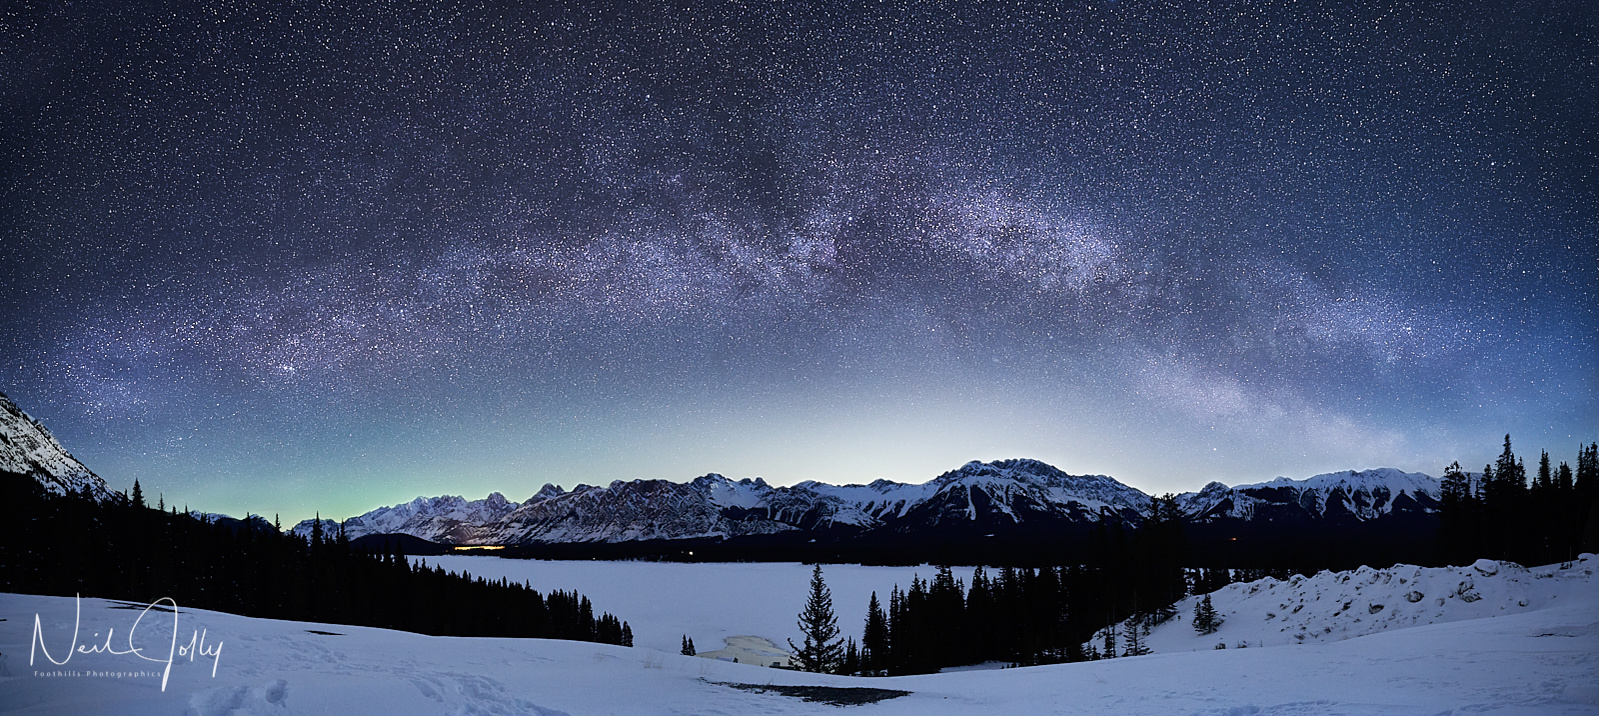
The image above was shot using a star tracker that moves the camera at the same speed as the earth to keep the stars stationary to the camera allowing longer exposures. This can allow you to use a camera that is not stellar at high ISOs to get good night images. If you’re going to use a star tracker you will have to blend two shots to get a detailed foreground like the image above. The foreground blur is a result of the camera movement due to the star tracker when using longer exposures. Generally speaking there are two distinct styles of night shots. One is with pinpoint stars, and the other is with star trails. As you can see in my images I prefer the pinpoint stars, but you may not. Ultimately you have to get out and experiment to find out what you like and what works best with your equipment. Darker locations will net better night sky images. Moonlight can yield some lovely moody night images as you can see in the examples below.

Many people don’t feel comfortable being out at night alone. If that’s the case for you then get together with friends and start shooting at night. Astrophotography is great way to extend your skills and learn more about the night skies. Experiment lots shooting at different combinations of ISO and shutter speed till you find your camera’s sweet spot. Next time I’ll visit planning your night shoot. See you out there!